


It’s time to get your hands dirty! This DIY Paper Mache Bank craft is a bit messy but well worth it! I decided on a flower paper mache bank for my design frame but you can get creative and build your own.
Supplies You’ll Need to Make Your Own Paper Mache Bank

- toilet paper rolls
- masking tape
- scissors
- liquid glue
- velcro
- paint
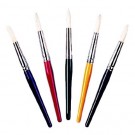
- paintbrush
- Xacto Knife
- newspaper
- 2 cups of water
Step 1: Build Flower Bank Frame
First, organize toilet paper rolls into a flower shape.
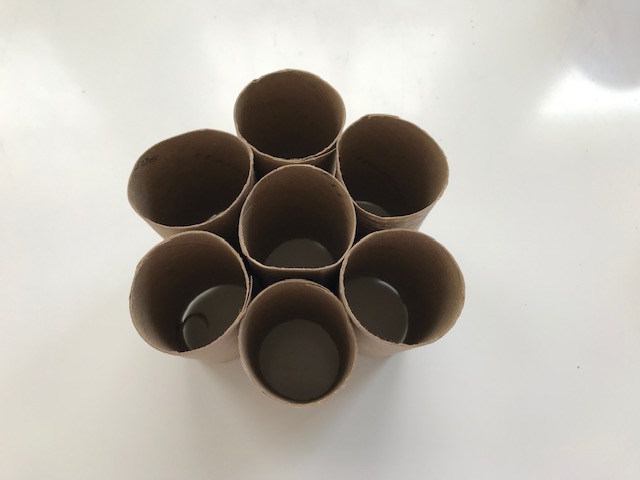
Next, tape toilet paper rolls together with small pieces of masking tape on both sides.
NOTE: Don’t tape the middle toilet paper roll.

Remove middle toilet paper roll.

Step 2: Cut Out Middle of Flower Bank Frame
Take your scissors and cut out the inside parts of the toilet paper rolls. Between the tape is a good guide.

Tape the cuts together.

Step 3: Make Paper Mache Paste
Use equal parts of water and glue to make the paper mache paste. Stir it up real good. It’ll look milky.
Step 4: Paper Mache Frame
Rip your packing paper up into small thin strips – about 6” long and an 1” wide.
Pick up a strip and dip it into the paper mache paste. Make sure the entire strip is coated and with your fingers squeegee any excess off. You can do this by placing the strip in-between two of your fingers and sliding your fingers down to remove any excess paste.
Now stick the coated strip onto your frame. Gently smooth the edges down to hold it in place. This also helps with blending once you get further along with the paper mache.
Repeat this step until you have one side done. Set it aside to dry.

NOTE: It’s ok if you need to tear a slit in your strips so that you can warp it nicely around edges.
Once your first side is dry, repeat this process to the other side. Set it aside to dry.

Step 5: Paint Paper Mache Bank

Pick your paint colors. Paint your design. This part is all for you to express your own creativity.
Once you’re finished painting set it aside to dry.
Step 6: Cut Coin Insert to Top of Bank

Take your Xacto knife and cut a coin slit somewhere on the top.
Step 7: Create Coin Dispensing Hole

Unlike a typical piggy bank with a circular hole on the bottom to dispense your money, my hole is rectangular – it works better with my Velcro piece.
NOTE: Make sure it’s big enough to dispense multiple coins at once and paper bills (if you plan to put paper bills in the bank).
Step 8: Secure Coin Dispensing Hole
Take your scissors and cut the rougher Velcro piece to fit over the hole. I eyeballed it but you can always measure it with a ruler.

Stick the softer Velcro piece on top of the cut piece and cut it to size; however, you’ll want to leave a little tab so your little one can easily pull it off.

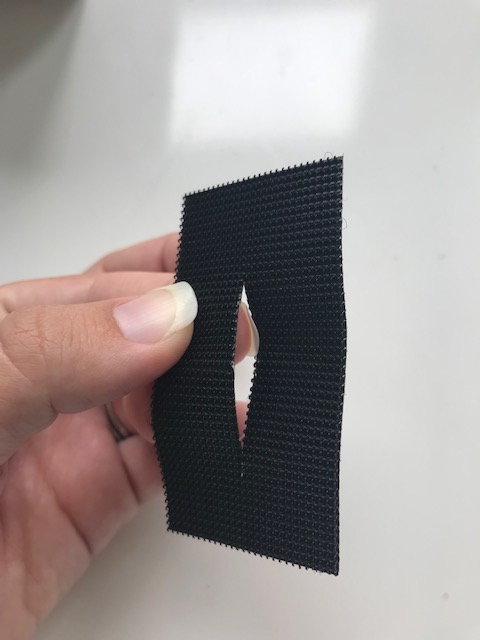
Take the rougher Velcro piece and cut a slit in it.
Remove the backing of the Velcro and stick it over the hole.

Use your Xacto knife or scissors to cut the hole out using the slit as your starting point.

Place the other Velcro piece over it and BAM!…you’re done!


We hope you found this to be helpful. If you did, let us know in the comments below and be sure to sign up for our newsletter so you get all the exclusives, offers and the latest from EconoCrafts. We ask that you share this with anyone who you feel might find this helpful as well.
Leave a comment and we’ll send you a $5 off promo code.
Do You Have any Craft Ideas or Questions
Do you have a craft idea that you’d like us to make? Do you have a question about arts and crafts that you’d like us to address in our next post? Email us with any ideas or questions you have. If we feature your idea or question we’ll give you $5 off your next order.
Who’s EconoCrafts? EconoCrafts is a manufacturer of unique and exciting arts and crafts kits and hobby supplies. They sell to Schools, After-School, Camps, Recreation Centers, Nursing Homes, Hospitals, Government Agencies, and crafters all over the world. From the classroom to your home, for a party to a DIY project, EconoCrafts has everything you need to keep you creatively entertained.
Written by: Amanda Kearns
Amanda attended Columbia College Chicago where she earned her Bachelor’s Degree in Journalism. She happily accepted a job in the sunshine state of Florida, where she worked for many years blogging, editing, and managing mostly legal content. She now resides in South Carolina with her beautiful son and loving husband.
In her free time, Amanda loves to stay active whether it be at the gym, hiking, or throwing around a baseball. She’s also a big DIYer. In fact, much of the artwork and design elements in her house were created by her and she’s even made some of her own clothes!


